Ah, the dog bed: the ultimate cozy sanctuary for our pups. It’s a place where they can dream of chasing squirrels and enjoy their deepest, most peaceful naps.
But let’s be real- it’s also a magnet for everything our dogs bring in from the outside. Between the fur, the hidden dirt, and that unmistakable “doggy smell,” it doesn’t take long for a blissful resting place to feel a little… less than Zen.
As a dog owner myself, I’ve realized that washing a stuffed dog bed can feel like solving a puzzle without the picture on the box.
You might be asking yourself: Can this dog bed really go in the washing machine? Will the stuffing clump up forever? And how do I get rid of that smell without using chemicals that might irritate my dog’s skin?
As it turns out, bed hygiene is a huge part of your dog’s wellness, ranging from their skin health to their respiratory comfort.
In this guide, I’m breaking down exactly how to wash a dog bed with stuffing to keep it fluffy, fresh, and (most importantly) healthy for your best friend.
Before You Begin: Your Cleaning Toolkit
To get your dog’s bed truly clean without damaging the fabric (or irritating their skin), you’ll need a few key supplies.
The Daily Essentials
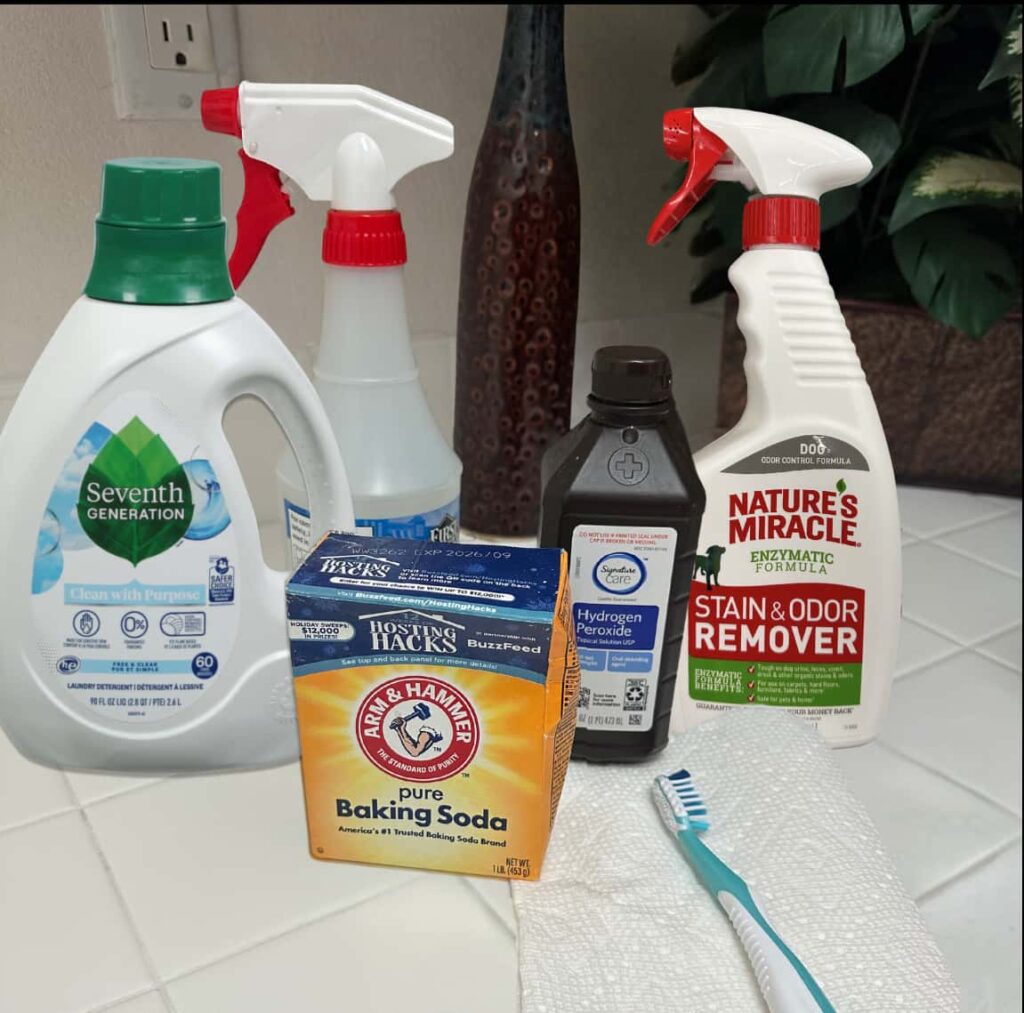
- Mild Pet-Safe Laundry Detergent: I recommend using a “Free and Clear” option, such as the Seventh Generation Free and Clear. It lacks the heavy synthetic fragrances that can be overwhelming for a dog’s 300-million-receptor nose.
- Vacuum with Upholstery Attachment: Your first line of defense against dander. A handheld pet vacuum is perfect for pulling fur out of the “nooks and crannies” of your dog’s bed.
- Soft-Bristled Brush: I suggest keeping a simple upholstery brush (or even a clean, old toothbrush) on hand. It’s perfect for dislodging dried mud or “crusty” messes without fraying the fabric fibers.
- Mesh Laundry Bag: This is the secret to protecting a dog’s fluffy bed. Using a Jumbo Mesh Bag prevents the internal stuffing from clumping together during the spin cycle.
The “Deep-Clean” Science Kit
- Enzymatic Stain Remover: These are biological cleaners that literally “digest” protein-based stains, such as drool and urine. I personally use Nature’s Miracle Stain and Odor Remover because it targets odors at the molecular level, ensuring the scent is gone- not just masked.
- 3% Hydrogen Peroxide: A must-have for visible organic stains. Pick up a standard bottle for a gentle, oxygen-based alternative to harsh bleach. It uses a process called oxidation to lift pigments and sanitize the fabric without the toxic fumes.
- Large Clean Towels: Essential for the “squeeze, don’t wring” method. This is the key to removing excess water while protecting the bed’s internal structure and shape.
🌿 The Natural Tip
If you prefer a chemical-free home, you likely already have two of the best cleaners in your pantry: Baking Soda and White Vinegar.
🧂 Baking Soda: Sprinkle it on the bed 20 minutes before vacuuming. It’s a natural method for removing deep-seated odors from the fabric.
🧪 White Vinegar: Add a half cup to the rinse cycle. It acts as a natural disinfectant and helps break down any lingering detergent residue that might cause “itchy skin” for your pup.
How Often Should You Wash a Dog Bed with Stuffing?

Before we dive in, we need to address one of the most common questions pet owners ask: How often does a dog bed actually need to be washed?
From a biological standpoint, the answer comes down to managing the microbial load. This is the gradual buildup of bacteria, allergens, and other microscopic organisms that accumulate within the fabric over time.
To keep your home healthy, follow these three rules:
- The Standard Rule: For most healthy dogs, washing the bed every two weeks strikes the perfect balance between cleanliness and practicality.
- The High-Traffic Rule: If you have a puppy in training, a senior dog that has accidents, or a “mud-magnet” who loves playing outdoors, increase the frequency to once a week (or every few days during messy weather).
- The Maintenance Rule: A full wash isn’t always necessary for a refresh. Shaking the bed out daily and vacuuming mid-week removes surface debris before it can work its way deeper into the fibers. This “maintenance” makes your deep clean much more effective.
Phase 1: Pre-Cleaning (Laying the Groundwork)
Knowing when to wash is only half the equation. It is how you wash that determines whether you’re truly eliminating the microbial load or just redistributing it deeper into the fabric.
Thus, cleaning a stuffed dog bed starts well before the water runs; it isn’t as simple as tossing it in the wash.
To get professional results, we begin with Phase 1: Pre-Cleaning, a few essential steps that protect your washing machine and ensure a genuinely deep clean for your pup.
1. Decoding the Care Label
Start by taking a moment to locate the care tag on your dog bed — it’s that small strip of fabric usually tucked into a seam or corner. It’s easy to overlook, but it’s the single most important guide to washing your dog bed correctly.
The care tag will tell you whether the bed is machine-washable or requires a more delicate hand-washing. It may even provide specific instructions on the ideal water temperature, the type of detergent to use, and the drying method.
Following these instructions isn’t just good practice; it can be the difference between a bed that lasts years and one that shrinks, pills, or loses its support after a single wash.
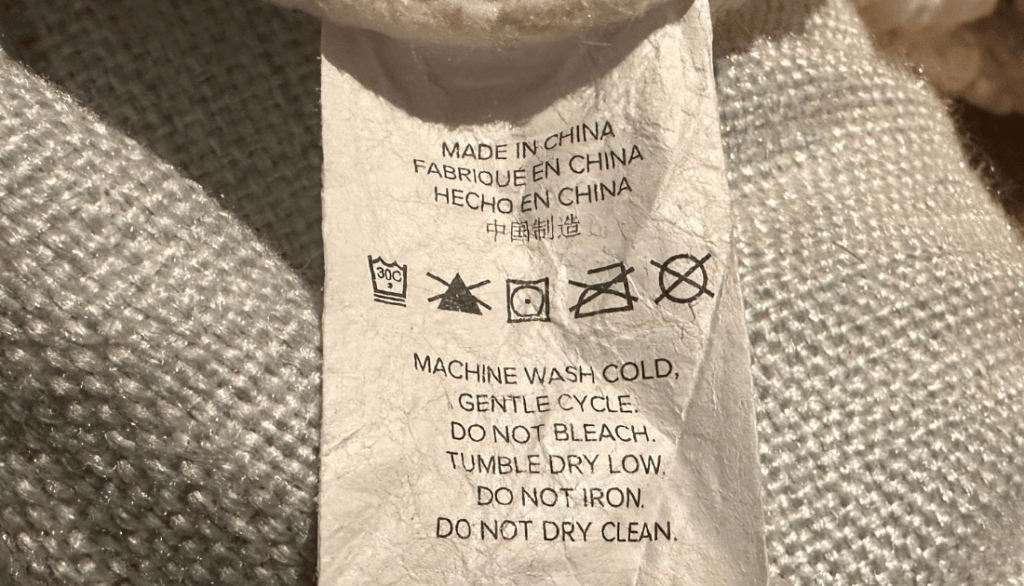
Note: If the label is missing or too faded to read, don’t worry. Default to a gentle cycle with cool water and a mild detergent. This minimizes the risk of fabric shrinkage and prevents the internal stuffing from clumping.
2. The Physical Inspection
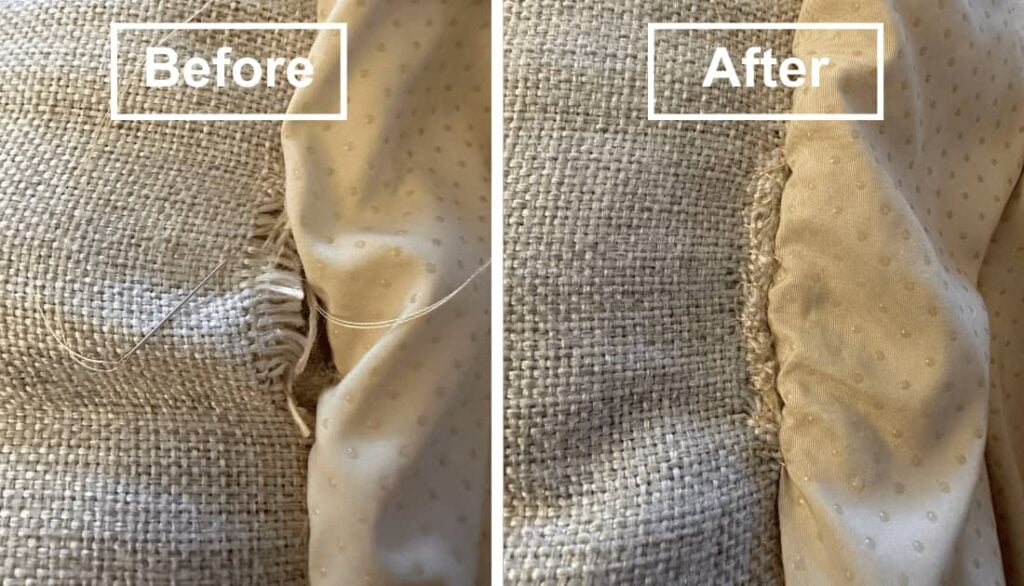
Next, I suggest you examine the bed closely. Check the bed cover for rips, worn seams, or any other battle scars from bed-chewing or nesting that you might miss until it’s too late.
📌 Pro Tip: If you spot a tear, sew it up before washing. A double-stitch is worth the extra minute because it reinforces the weak spot and prevents the kind of stuffing explosion that can clog your washing machine’s filter and ruin the bed in a single cycle.
3. The “Dry” Clean
Before any water touches the bed, take it outside for a vigorous shake — fair warning, this is messier than it sounds. Dog hair has a way of ending up everywhere except the trash bag. This helps to dislodge any large debris before vacuuming.
For dried mud or crusty spots, I suggest working them loose with a soft-bristled brush while everything is still dry. This is an easy step to skip, but it’s important.
Addressing these patches dry prevents them from turning into a muddy paste once the fabric gets wet, which is much harder to remove and can set the stain deeper into the material.
4. Vacuuming for Health
Next, use your vacuum upholstery attachment to vacuum both sides of the bed, paying extra attention to the seams where hair and debris tend to hide.
You aren’t just removing visible fur; you’re also vacuuming out dander (microscopic shed skin cells) and dust mites that nestle deep into fabric folds.
When left unchecked, these hidden irritants can trigger skin sensitivities and respiratory issues for your dog, even after a full wash cycle.
5. Targeted Spot Treatment
Now it’s time to tackle those stubborn stains.
A common mistake pet owners make is assuming that one cleaner fits all, but the wrong product on the wrong mess can actually set a stain permanently rather than lifting it out.
To get the best results, you have to match the right solution to the stain’s molecular makeup.
The Spot-Cleaning Science Chart
Because I look at dog messes through a biological lens, I categorize stains by their chemical properties. Whether you are dealing with acidic vomit or alkaline ammonia from urine spots, here is a quick reference guide on treating the most common dog bed disasters.
| Stain Type | Recommended Treatment | The Biological Perspective |
|---|---|---|
| Urine | Blot, then apply 1:1 Vinegar/Water, followed by an Enzymatic Cleaner. | Vinegar neutralizes alkaline ammonia (the source of the sharp odor), while enzymes “digest” the uric acid crystals to prevent the smell from returning. |
| Mud | Let dry completely, then brush off before dabbing the spot with an enzymatic cleaner. | Adding water to dry mud creates a “sludge” that pushes minerals deeper into the fabric, making it much harder to remove. |
| Drool | Wipe up excess, then apply a paste of 3 parts baking soda and 1 part water. | Saliva is rich in digestive enzymes and proteins. Baking soda acts as a gentle abrasive to lift these proteins before they “bond” and stiffen the fabric. |
| Vomit | Remove solids, then blot. Apply 1:1 Vinegar/Water or 3% Hydrogen Peroxide. | Vomit is highly acidic. Neutralizing that acid quickly prevents it from permanently bleaching the fabric fibers. |
| Poop | Remove solids, blot, and use an Enzymatic Cleaner. | Enzymatic Cleaner. This is a complex biological mess of lipids (fats) and bacteria. Enzymes are the only way to physically “digest” the organic matter. |
| Blood | Cold water only. Use 3% Hydrogen Peroxide for light fabrics. | Heat “cooks” the proteins in blood (hemoglobin), binding them to the fibers forever. Cold water keeps them soluble, so they can wash away. |
| Grass | Rinse with cool water, then dab with a tiny amount of Mild Detergent. | Grass stains are chlorophyll pigments. Detergent acts as a surfactant to “grab” the pigment molecules and lift them out of the weave. |
🧪 The Science of “Dwell Time”
When applying an enzymatic cleaner, the most important ingredient is time.
Why? Enzymes are biological catalysts that physically “digest” protein molecules found in saliva, urine, and feces. Giving the solution 15-30 minutes of “dwell time” ensures these proteins are fully broken down at a molecular level before you begin scrubbing.
Phase 2: Washing a Dog Bed with a Removable Cover
Now that the pre-cleaning stage is complete, it’s time to tackle the cover itself.
Whether you’re using a machine or washing by hand, the goal is the same: a genuinely deep clean that removes odor, bacteria, and allergens — not just surface dirt.
Method A: Machine-Washing the Dog Bed Cover
Before loading the cover, check that your washer’s drum is large enough for it to move freely during the cycle. A cramped drum can damage your machine’s suspension and prevent the cover from tumbling.
💡 Why else is “cramming” bad?
When a bed cover is packed too tightly, water cannot fully penetrate the dense material. This creates dry pockets where detergent residue, skin oils, and microscopic allergens become trapped against the fabric instead of being flushed away.
This residue can lead to contact dermatitis (skin irritation) once your dog settles back into their bed.
Machine-Washing Protocol
Once you’ve confirmed the fit, set your machine to the following dog-safe settings:
- Temperature: Always wash on cold with a gentle cycle. High heat is the enemy of dog bed fabric — it shrinks covers, breaks down fibers, and can warp foam inserts that would otherwise last years.
- The Extra Rinse: If your machine has this setting, use it every time. If it doesn’t have an extra rinse option, run a second “Rinse & Spin” cycle immediately after the wash completes.
🔬 The Importance of an Extra Rinse
Dogs have a sense of smell that is tens of thousands of times more acute than ours. Residual surfactants (the cleaning agents in detergents) can linger in the fabric, irritating a dog’s respiratory system and sensitive skin. Therefore, a second rinse is highly recommended for their long-term comfort and health.
Method B: Hand-Washing the Dog Bed Cover

Sometimes, machine-washing simply isn’t an option, whether your washer is unavailable, the bed is too large to fit, or the fabric is too delicate to withstand the agitation.
In these cases, hand-washing is not just a backup plan. When done correctly, it’s actually gentler on the fabric’s structure and just as effective at removing odor and bacteria.
- Start by filling a basin or bathtub with lukewarm water and a pet-friendly detergent.
- Add baking soda to the water– use 1/2 cup for light odors and up to 2 cups for stronger ones. Baking soda acts as a mild alkaline buffer, neutralizing the acidic odor compounds that cling to fabric.
- Submerge the cover and let it soak for 25-30 minutes. Gently knead the fabric with both hands as you would bread dough.
- This mimics the agitation of a washing machine while protecting the fibers’ structural integrity, which is especially important for covers with quilted stitching or padded panels.
- Rinse the cover under cool running water until it runs completely clear. Then gently press out the water with your hands, avoiding wringing or twisting.
- Twisting places uneven stress on the seams and internal liners, which can permanently distort the cover’s shape.
Drying the Dog Bed Cover
Drying is where many people go wrong, yet it is the step that is most likely to undo everything you have just done.
A cover that isn’t completely dry creates warm, damp conditions favorable for mold and mildew to thrive. Once fungal spores take hold in the interior stuffing, no amount of rewashing will fully eliminate the musty smell.
Determining the Best Drying Method
The right drying method depends entirely on the material your dog’s bed is made of. Thus, I’ve created this quick-reference chart to help you choose the best drying strategy based on your bed’s material, ensuring both longevity and a “like-new” feel:
| Dog Bed Fabric Type | Recommended Drying Method | The “Why” |
|---|---|---|
| Synthetic (Polyester, Nylon) | Low heat tumble / Wool dryer balls | Prevents denaturing (melting) of the synthetic polymers. |
| Microfiber | Air dry or low heat tumble | Prevents static-clumping of the ultra-fine filaments. |
| Cotton | Air dry (Rack or clothesline) | High heat causes fiber contraction (permanent shrinkage). |
| Fleece | Air dry (Avoid direct sunlight) | Protects the soft “pile” from heat-matting and stiffness. |
| Canvas | Air dry or low heat tumble | Prevents the heavy weave from becoming brittle and cracking. |
| Waterproof/Outdoor | Air dry (Flat in shade) | High heat can degrade the polyurethane coating (the barrier). |
| Linen | Air dry or low heat tumble | Minimizes fiber stress; high heat makes flax fibers fragile. |
| Faux Fur | Air dry (Cool only) | Heat permanently “frizzles” the synthetic protein mimics. |
| Wool | Air dry flat | Prevents felting (the interlocking of microscopic scales). |
| Leather | Air dry (Away from heat) | Prevents desiccation (loss of moisture) and surface cracking. |
I cannot emphasize this enough: ensure the cover is 100% dry before reassembly. You can verify this by pressing your hands firmly into every section of the cover, specifically the corners and padded panels.
If any area feels even slightly cool or damp to the touch, it needs more time. Trapping even a trace of moisture can trigger rapid mold growth and undo all your hard work.
Phase 3: Cleaning the Dog Bed Stuffing
With the exterior cover handled, it’s time to address the true heart of your pet’s haven: the stuffing. You might be wondering, “Why do I need to clean the interior if it wasn’t directly exposed?” It’s a fair question.
However, dog bed stuffing can become a breeding ground for trapped allergens, stagnant odors, and even microscopic pests that a surface wash cannot reach.
Cleaning both the cover and the inner material is essential for maintaining a hygienic space for your dog. Here’s how.
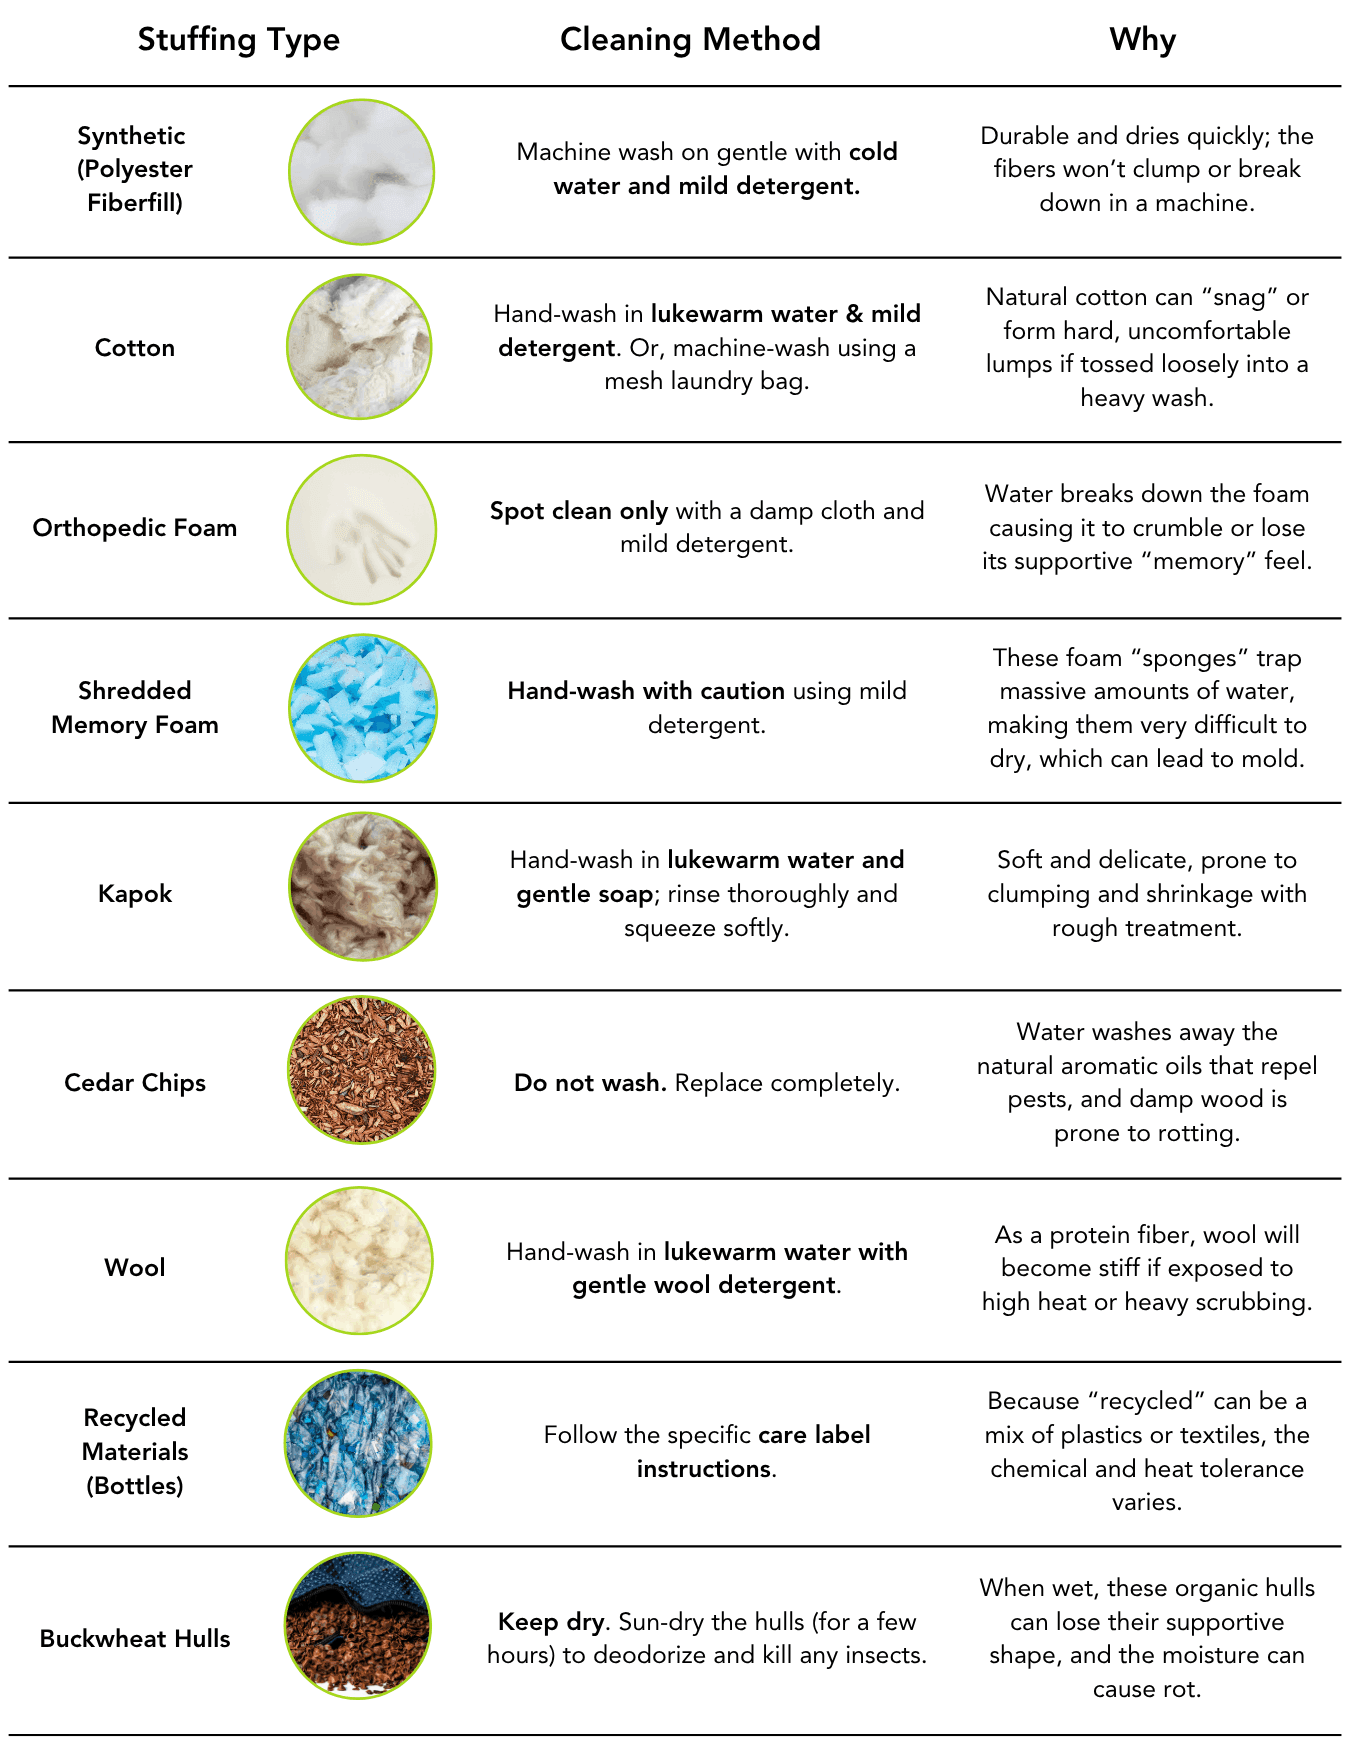
Identifying the Type of Stuffing Material
First, check the care label on your dog’s bed to identify the type of stuffing. Just like our canine companions, not all dog beds are the same, so the cleaning method will vary depending on the stuffing material.
For example, dog beds made with memory foam should never be submerged in water, as the foam can absorb moisture like a sponge, leading to mold and mildew growth.
In contrast, if your dog’s bed is filled with cedar chips, it’s best to replace the filling rather than attempt to wash it. Soaking cedar chips can compromise their natural pest-repelling properties.
The Stuffing “Field Guide”
To effectively clean your dog’s bed, refer to the field guide below for a full breakdown of stuffing types and their recommended cleaning methods.
Preparing the Stuffing for the Wash
With your stuffing type identified, take a moment to properly secure the stuffing before beginning the cleaning process. Skipping this step is how you end up with a machine full of loose foam fragments or a lumpy, misshapen interior that cannot be fixed.
- The Mesh Barrier: If the stuffing is loose, such as shredded foam or polyester fiberfill, transfer it into a large zippered mesh laundry bag or a clean white pillowcase secured with a safety pin.
- The Zipper Lock: Since high-speed agitation in a washer can cause zippers to open mid-cycle, taking 3 seconds to insert a safety pin through the zipper pull can help prevent a stuffing-shredding disaster.
Method A: Cleaning the Stuffing in a Washing Machine
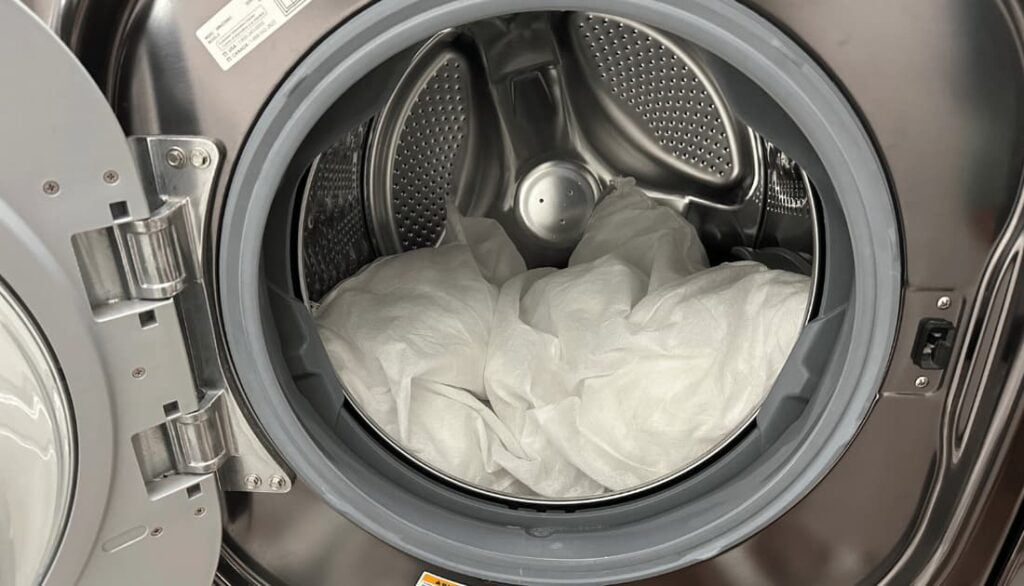
Before loading anything into the machine, confirm that your stuffing is machine-washable. As covered in the field guide, Polyester Fiberfill and Cotton are the most resilient materials for this method, while others require a gentler approach.
If your stuffing qualifies, place the secured mesh bag or liner into the washing machine drum and follow these settings:
- Detergent: Use a mild, pet-friendly detergent. Avoid fabric softeners and harsh chemicals, as they can leave a residue that may irritate your dog’s sensitive skin.
- Cycle: Select a gentle or delicate cleaning cycle with cold or lukewarm water. This is the best option to prevent any damage to the material.
Method B: Hand-Washing the Inner Material of the Dog Bed
Hand-washing isn’t just a fallback for when the machine isn’t available.
For delicate materials like Kapok, Wool, or Shredded Foam, it’s genuinely the better method. And because of how delicate they are, these materials can compress, clump, or break down under machine agitation, which cannot be undone.
So, taking a little extra time to hand-wash now can help you avoid having to replace the entire bed later.
- Prepare the water: Fill a large tub or bathtub with cool to lukewarm water. Add a small amount of pet-safe detergent and mix it in by hand until you have a consistent, evenly soapy solution without concentrated pockets of soap at the bottom.
- Submerge and work the material: Lower the stuffing (keeping it inside its protective liner or mesh bag, if possible) into the water. Using both hands, gently squeeze and release the material in a “pulse”-like motion.
- Target the “Hot Spots”: For any stained or odorous spots, spend extra time working the material between your fingers with light friction. You’re breaking down the organic proteins and oils responsible for the stain at the molecular level.
- Rinse thoroughly: Drain the soapy water and refill the tub with fresh, clean water. Continue that same pulsing motion, replacing the water as many times as necessary until it runs completely clear, and all bubbles have disappeared.
- Remove excess water: Gently press and squeeze the stuffing to extract as much water as possible. Avoid wringing or twisting the stuffing to maintain its structural integrity.
Drying the Stuffing
Lastly, properly drying the stuffing is extremely important.
Since filling material is dense, moisture doesn’t just sit on the surface; it migrates to the center where airflow can’t reach it. Left there, even a small amount of residual dampness creates an environment conducive to mold and bacteria.
Option 1: Air Drying (Best for All Materials)
Air drying is the safest and most recommended method for drying the stuffing — and when done in direct sunlight, it’s also the most effective.
- Lay clean towels on a flat, sunlit surface. Sunlight isn’t just warmth; it’s a natural UV disinfectant that neutralizes lingering bacteria and odors.
- Every 30 to 45 minutes, flip the stuffing and fluff it by hand. Dense filling compresses under its own weight as it dries, trapping moisture in the lower layers and causing uneven drying.
- Turning it regularly restores airflow throughout the material, speeds up the process, and helps the stuffing recover its original loft and shape — the thing that actually gives your dog the support they need.
- If outdoor drying isn’t an option — whether due to humidity, weather, or space — place the stuffing on a clean dry towel indoors, positioned directly in front of a fan or near a dehumidifier.
- Moving air removes moisture from dense materials; still, indoor air, even in a warm room, is rarely sufficient on its own.
Option 2: The Machine Dry (For Synthetics Only)
For synthetic materials, such as Polyester Fiberfill, a dryer is an option, but only on the right settings. Use this method with extreme caution:
- Dryer settings: Always select the lowest heat setting available, or use a no-heat, air-only cycle. High heat can denature (melt) synthetic fibers like polyester, causing them to bond together and become hard, “crunchy,” and uncomfortable for your dog.
- The “Agitation” Method: Add 2-3 clean tennis balls or wool dryer balls to the dryer. As they tumble, they strike the damp stuffing repeatedly, mechanically breaking up clumps and forcing air through the material. This allows it to dry more evenly.
Phase 4: Washing a Stuffed Dog Bed Without a Removable Cover

Sometimes the cover and stuffing are sewn together as a single unit, lacking a zipper and a removable liner. These beds require a bit more manual effort, but a genuinely deep clean is absolutely achievable.
The key is working with the fabric rather than against it. Instead of forcing dirt deeper into the core, your goal is to use the natural movement of water through the fibers to draw the grime out — not push it further in.
The “Deep Soak” Protocol
- Pre-Clean:
- Vacuum both sides of the bed thoroughly, paying close attention to the seams where hair, dander, and debris accumulate.
- Next, sprinkle a layer of baking soda over the surface and leave it for 30 minutes to absorb lingering odors. Vacuum one final time before introducing water.
- Spot Treatment:
- Address visible markings and stains.
- For fresh messes: Press a clean cloth firmly onto the area to absorb the liquid. Resist the urge to wipe, which can spread the stain.
- For set-in stains: Work a pet-safe enzymatic remover into the area with a soft-bristled brush using small circular motions. Let it dwell for 15 minutes to break down organic proteins.
- Address visible markings and stains.
- Immersion:
- Fill a tub with cool water and a measured amount of pet-friendly detergent. Submerge the entire bed and let it soak for 15 to 30 minutes.
- You’ll likely see the water change color as dirt and oils release from the fabric, which is exactly what you want.
- Fill a tub with cool water and a measured amount of pet-friendly detergent. Submerge the entire bed and let it soak for 15 to 30 minutes.
- Agitation:
- Once the soak is complete, work through the bed with both hands using a slow, rhythmic pulsing motion.
- This encourages the soapy solution to move through every layer of the core material rather than just cleaning the surface fabric.
- Once the soak is complete, work through the bed with both hands using a slow, rhythmic pulsing motion.
- Triple Rinse:
- Drain the tub and refill it with clean water. Repeat the squeezing process until the water runs completely clear.
- This typically takes at least three full rinses, sometimes more for thicker beds.
- Drain the tub and refill it with clean water. Repeat the squeezing process until the water runs completely clear.
- Water Extraction:
- Carefully lift the bed (it will be significantly heavier when saturated) and press it firmly between two large, dry towels.
- This extracts excess water and prevents the stuffing from clumping.
- From here, follow the air-drying steps covered in the previous section.
- Carefully lift the bed (it will be significantly heavier when saturated) and press it firmly between two large, dry towels.
Additional Tips to Maintain Hygiene and Cleanliness
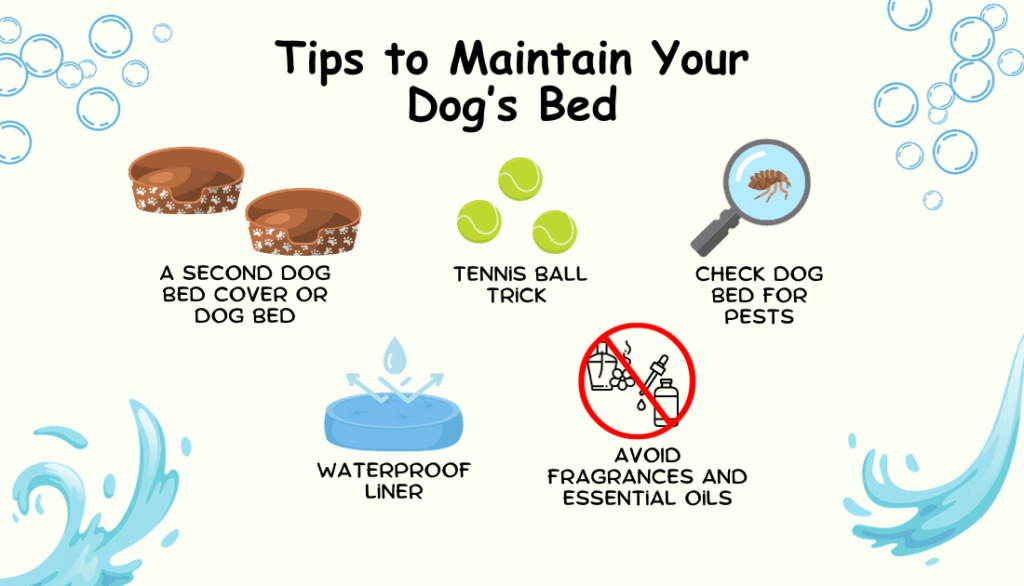
Before we wrap up, here are some expert tips to keep your dog’s bed fresh and well-maintained.
- Use a Rotation Strategy: Consider investing in a second cover or an extra dog bed. This allows you to always have a clean place for your pet to rest by simply switching covers (or beds) while the other one is being cleaned.
- Don’t Forget the Tennis Ball Trick: As mentioned before, tossing in 2-3 clean tennis balls in the dryer is a great way to prevent the bedding from clumping. The bouncing action not only speeds up the drying process but also serves as a natural, chemical alternative to dryer sheets.
- The Pet Inspection: Regularly check the bed’s seams and crevices for any unwanted guests, such as fleas, ticks, and even spiders.
- The Waterproof Barrier: If accidents are common, using a waterproof liner can be a game-changer. It protects both the cover and the inner material from moisture and bacteria, making cleaning much easier.
- Avoid Sensory Overload: Avoid using strong fragrances or essential oils to freshen up a dog bed. Because dogs have sensitive noses, these strong smells can be overwhelming. What might smell like “lavender” to you could feel like a chemical attack on their respiratory system.
Conclusion
A clean bed isn’t a luxury; it’s one of the simplest and most overlooked ways to protect your dog’s health.
By following this guide, you’re doing more than washing a piece of furniture. You’re managing the bacterial buildup, allergens, and hidden irritants that accumulate silently in the fabric your dog spends hours in every single day — none of which show up overnight, but all of which add up over time.
Think of regular cleaning the way you think of regular vet visits: not something you do because something is visibly wrong, but because prevention is always easier than correction. Your dog can’t tell you when something is bothering them. But you can make sure their bed never has to.